Part of being a full time RVer involves cleaning and maintaining the holding tanks. When we talk about the best way to clean RV holding tank we mean the black tank where all the waste water goes. It’s not a pleasant task but it’s an essential one. The job isn’t as hard as it may seem though as I’ll show you how it is done.
What is the best way to clean rv holding tank?
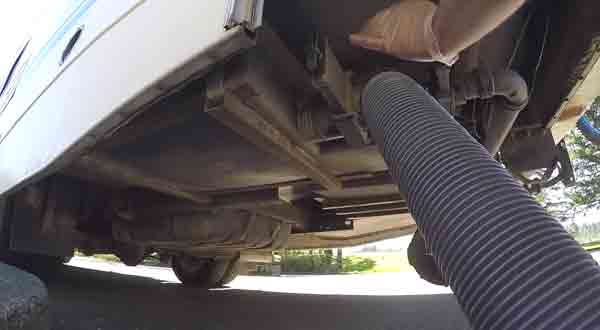
1. Protect Yourself
The contents of the sewer tank and hose are hazardous to your health so wear protective glasses, rubber gloves and shoe covers. Have paper towels and liquid soap to wash your hands afterwards.
2. Background
Your RV has two tanks, gray and black. The gray tank contains the water that comes from your sinks and shower. It is gray because of the residue and dirt it contains. The black water tank contains water and waste from your toilet.
3. Start With the Right Base
The black tank must have some water at the base. The water serves the same purpose as that of the water in your toilet bowl, to ensure the solid waste moves along and does not stick to the tank. The water also keeps the tank from smelling.
4. RV Black Tank Chemicals
Aside from the water you should also put black tank chemicals in it. You can buy these chemicals online and pour them in the toilet. These chemicals remove the odor and also breaks down the solid waste in the tank.
The amount of chemicals you’ll put in the tank depends on how often you use the toilet. If you only use your RV during the weekends, a couple of ounces will be fine. If you live full time in the RV you need to use more chemicals more often.
6. Emptying Your RV Black Tank
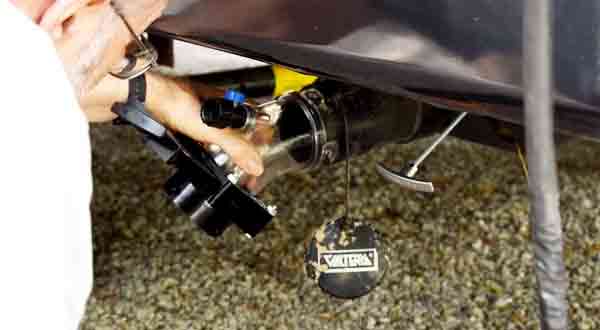
To empty your black tank, look for a designated RV dump site. Hook up the waste hose onto the RV and onto the dump station. Always empty the black tank first. Once the black tank is empty, close its valve and empty the gray tank. It is important that you follow this order so the gray tank flushes out any waste residue.
7. Deep Clean Your Sewer Tank
Regular cleaning of tanks is not enough as you need to do deep cleaning once a week. Prior to opening the gray water valve do the following.
- Completely drain the waste water tank.
- Fill it up with freshwater three quarters of the way up. Add 2 cups of liquid beach.
- Let the mixture settle for ten minutes before draining the tank.
- Fill the tank with freshwater again.
- Keep draining and filling the tank until the bleach smell is gone and there are no more debris in the connector hose.
Keep repeating the above steps until you’re sure the plumbing is completely bleach free. Some people say it’s not a good idea to use bleach because it might damage the plumbing. But as long as you use a good amount of water this won’t happen.
8. RV Black Tank Flushing
Emptying the black tank regularly helps, but you also need to do a thorough cleaning. Waste, tissue paper and liquids accumulate and this can lead to clogs. A clogged tank can also wreck havoc on the full tank sensors.
To flush the black tank, flush it down using the valve. You just connect the hose to the rinse valve with the hose. Once the water starts running in the black tank it will flush the waste out.
If your black tank doesn’t come with a flush valve you can purchase an aftermarket flush valve and install it. These flush valves come in different shapes and sizes so you should find on that is compatible with your RV.
You can also clean the tank manually by using specially designed garden hose extensions. These hoses rinse and spray water to eliminate tissue and other stuff that is blocking the black tank.
If you want to use a garden hose rinser you have to shut off the water pump and your RV must not be connected to a city water connection. Now open the flush valve and put the holding tank rinser inside the toilet.
Turn on the water and the rinser will go to work. Twist and turn the rinser so it cleans all the sides. When you’re done with the rinser, empty the tank as you regularly do.
9. Back Washing Equipment
Majority of RVs come with backwashing equipment. Refer to your owner’s manual for instructions on how to use it. If your RV doesn’t come with one you’ve got to buy a wand that is built for cleaning tanks.
There are different options but the best ones are those with a manual shut off and can swivel. Rigid wands are difficult to use and may become a two-person job.
10. Back Washing Directions
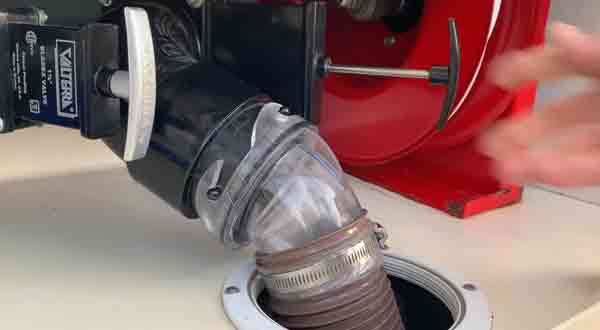
You’re going to do this once you have dumped the contents of your black tank but before emptying the gray tank.
If you’ve got a built in backwashing system:
- Connect your hose to the RV.
- Turn on the pressure washing valve.
- Keep running until the hose is clear.
If you’ve got a wand:
- Connect a garden hose to the water spigot in the campground.
- Link the hose and the backwash wand.
- Pull the hose and wand in the door or window into the bathroom.
- After opening the toilet flapper, pull the wand into the opening.
- Get someone to stand outside to turn on the water.
- Move the wand back and forth until you’ve cleared out the waste.
11. Using Enzyme Treatments
After you’ve dumped and cleaned your RV tank, use an enzyme cleaner to tidy up the tank. Most of the time you’ll dump every 3 to 5 days so you don’t have to apply enzyme daily. But don’t ignore this as it is what keeps the tank smelling good and clean.
To use an enzyme cleaner, just pour a packet in the tank and add 1 gallon of water. The enzyme eliminates the sludge around the tank. The dirt is converted into liquid so it flows quickly out of the tank.
Enzyme cleaners are cheap and effective. It prevents waste from hardening, which could clog the pipes and plumbing. Some enzyme cleaners are liquefied but the packet is more practical.
12. Storage Issues
Always deep clean the black water tank prior to storing it for long periods. If you’re not going to use the RV for a while, deep clean the sewer tanks so it does not produce odors.
13. Good RV Sewer Care Is Important
It goes without saying that your RV waste water tanks need to be taken care of. The few minutes you spend taking care of the tanks will do wonders for your RV.
14. Portable RV Waste Tanks
If you park in the same area for long periods and they don’t have a power connection, consider buying a portable RV waste tank. These tanks enable you to empty the gray and black tanks into another tank.
You can then take the tank to an RV dump station and dispose of the contents. These tanks have handles and wheels so they’re easier to transport. By keeping these portable tanks clean you can reuse them.
15. Finding RV Dump Stations near a Zip/Postal Code
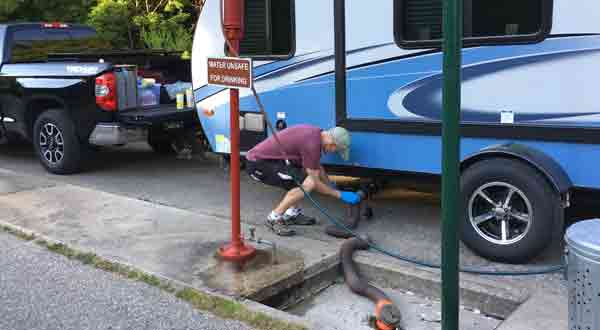
There are websites that let you find dump stations by entering a zip code or postal code. As an RVer you must know where to dump your tanks. Knowing where to dump RV waste is your responsibility as well.
Aside from zip codes and postal codes you can also find them online. There are also apps that you can use so it’s more convenient than ever. If you’re going to spend any length of time in an RV, you should have a list of the dump stations so you don’t have to wonder where to dump the tanks when it’s time.
16. Dump Station Types
There are many types of RV dump stations including:
- loacationFree dump stations
- Pay dump stations
- Donation dump stations
- Resort dump stations
- Commercial dump stations
- Campground dump stations
- Res stop dump stations
- Truck stop dump stations
- RV park dump stations
Depending on your location you’re in, only a few or several of these will be available. You don’t need several anyway, as a single good dump station is sufficient.
17. Safety Rest Area RV Dump Stations
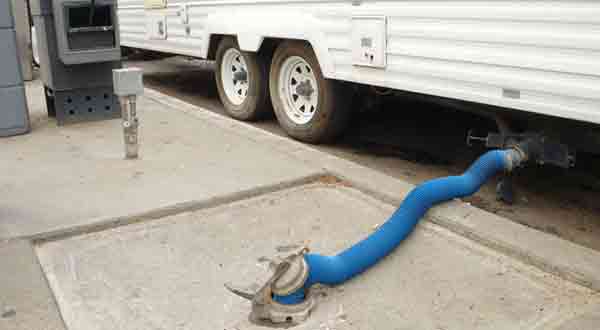
There are also Recreational Vehicles (RV) Sanitary Dump Stations in certain locations. These are built specifically for use by RV owners and not by other vehicles. These dump stations are funded by RV license taxes and they are open all year round.
18. Recreational Vehicle Citizens Advisory Committee
This committee is comprised of volunteer RV members who help establish guidelines to address the needs of RVers. This is the committee that also oversees use of RV funds and fees.
19. Dump Station Abuse
If you follow the best way to clean RV black water tank as described here, then you’ll be doing your part in preventing dump station abuse. For the longest time, states provided this service for free. But many campground owners and states are getting rid of these stations as RVers have been abusing them.
Dump station abuse happens when RVers dump stuff in the drain that should be disposed somewhere else. This makes the job of cleaning and maintenance harder. As an RV owner, you ought to do your part in keeping dump stations clean so you can avail of them.
Here are Some Tips on How to Use Dump Stations
- Dump only the contents of your gray and black tanks in the dump station.
- Leave the dump station as you found it. Restore and replace any hoses, spigots and equipment you used the way you found them.
- Follow the basic rule – empty the lack tank first followed by the gray tank.
- Do not empty the black tank until it is at least 2/3 filled up, and don’t leave the valve open when it’s connected to a campsite. If you do this the liquid will come out, leaving solids behind sticking on the tank.
- Do not dump anything else in the tank apart from the wastes in your tank.
- If the dump station is of the donation variety, donate. The money you give keeps the service running.
- Do not use anything less than a heavy duty hose. It should be 6 to 8 feet long at last so you won’t have problems with the handling.
- Clean your black and gray tanks on a regular basis. Use the enzyme cleaner and other solutions mentioned earlier.
- If it is a pay dump station with specific rules, follow the regulations.
- Do your best to be as quick as possible when emptying the tanks.
- Check your gloves and protective gear for stains. Wash them after each use.
There are a few more things you need to keep in mind. The dump station is for dumping waste only. Once you’ve done your business, it’s time to go. Don’t forget to clean the dump station if you left any mess behind.
Be mindful if there are other RVs waiting in line. If there is a long line, skip the hose rinsing and tank flushing. Just drive off and let the others proceed. You can just add chemicals and cleaning solutions.
If you are the only one in the dump station, you can do the tank and hose cleaning there. Once you’re done, spray water on the ground to remove any debris and dirt. Even if it is free, make sure it’s as clean as when you found it so it remains free.
RV garbage disposal is not a fun subject to talk about, but it is a vital one. It is easy to do, doesn’t take a lot of time and is going to keep your RV smelling good and fresh. And this is also the best way to keep your RV plumbing running smoothly.
Leave a Reply